Followers

Saturday, March 31, 2018

MORGAN'S ARTWORLD CHALLENGE

Hello There My Crafty Friends,
I want to let you know that there is a challenge going on at...
Morgan's ArtWorld CT
The theme is Always 'Anything Goes'

I think this little duck is so adorable, makes me want one. :)
...For This Card - Step By Step...
 Blue marbled cardstock for the card base.
Cut a piece of yellow cardstock to fit the center of the card.
Taped the paper onto the card.
Taped the image onto the card slightly slanted.
Then glued the butterflies onto the card. 

...Products Used... 
Love A Duck By: Morgan's ArtWorld
Marco Raffine Colored Pencils
Memory Box 'Calais Butterflies'
Ad-tech Crafter's Precision Glue
Plus Tape Runner
Blue Marbled/Yellow Cardstock

You are also invited to join the...  
You can see some of Morgan's beautiful art on her Facebook Page.
Morgans Facebook Page

I hope you like my card and it gives you some inspiration.

Thank you for visiting.
Happy Crafty Hugs,
Sherry x

Saturday, March 24, 2018

CUTE AS A BUTTON MARCH INSPIRATION

Hello There My Crafty Friends,
I would like to share a card I made with y'all for the
Cute As A Button Showcase Blog

I think 'My Bunny' is so sweet, I enjoyed making this card with her. 
...For This Card - Step By Step...
  Blue marbled cardstock for the card base.
Glued the dark pink die cut rose frame onto the card. 
Glued the light pink die cut rose frame onto the dark rose frame. 
Tied a ribbon onto the tag and taped it to the card slightly slanted.
Taped the image to the card slightly slanted. 
Glued blue and yellow flowers together, then glued a flatback pearl on them.
Glued the flowers onto the card.
Then glued three flatback pearls onto the tag.

...Products Used...
Digistamp 'My Bunny' By: Cute As A Button
Marco Raffine Colored Pencils
Unbranded Frame Die
Unbranded Rose Frame Dies
Unbranded Tag Die
Ribbon
Flowers
Flatback Pearls
Ad-tech Crafter's Precision Glue
Beacon Gem-Tac Glue
Plus Tape Runner
Blue Marble/White Cardstock

I hope you like my card and it gives you some inspiration.

If you're looking for some more inspiration come visit...
 There are many more wonderful images to chose from at...
 You still have time to join in the challenge...
 You are also invited to join the...  
 
Thank you for visiting.
Happy Crafty Hugs,
Sherry x
Wednesday, March 21, 2018

SCRAPY LAND CHALLENGE #86

Hello My Crafty Friends,
I want to let you all know that a new challenge starts today at...
The theme is 'Anything Goes' using any brand of die that Scrapy Land carries.

...I want to share with you what I made for this challenge...
I love this background die! It's delicate looking and has a pretty butterfly.
There is a pretty open framed area where you can add a sentiment, etc. 
But I thought it was the perfect spot for a basket of flowers.
...For This Card - Step By Step... 
White cardstock for the card base.
Cut a piece of pink cardstock to fit the center of the card.
Cut a piece of ivory cardstock to fit the center of the pink cardstock.
Used the distressing tool on the edges of the card and both papers.
Taped the pink paper onto the card, then taped the ivory paper onto the pink paper.
Glued the butterfly/flowers frame die cut in the center of the card.
Cut the handle off the basket and glued a piece of the pink paper onto the back of it.
Curved the center of the basket like a bowl shape.
Applied glue to the back of the basket, on the sides only.
Placed the basket onto the card, with parts of it behind the opening of the die cut. 
Glued the flourishes slightly above the basket.
Applied glue to each flower stem and put the flowers in the basket.
Made a bow with twine using the bow making tool.
Wrapped a cut off flower stem around the back of the bow. 
Glued the stem in the basket and the bow onto the basket.
 ...Used These Dies...
Darice Craft Dies 'Layered Flower Basket' - Here are other Darice options
Tattered Lace 'Florentine Flourish' Dies - Here are other Tattered Lace options

...Other Products Used...
Sizzix Vintaj Bigkick Die Cutting Machine
Prima Marketing Distressing Tool
Bow Making Tool
Darice Hemp Cord
Plus Tape Runner
Beacon Gem-Tac Glue
Ad-tech Crafter's Precision Glue
Pink/Ivory/White Cardstock

I hope you like my card and it gives you some inspiration.

There will be two winners chosen who will receive a $10 gift certificate to the
Scrapy Land Shop, so hope you come join us in the fun.

Have a great day! Thank you for visiting.
 Happy Crafty Hugs,  
Sherry x

Saturday, March 17, 2018

LEANN'S WORLD 101

Hello My Crafty Friends,
I want to share a card I made with you all using an image from...

Dogs are wonderful friends to have and I think 'Benji and Friend' is so adorable.
  ...For This Card - Step By Step..
 White cardstock for the card base.
Cut a piece of patterned paper to fit the center of the card.
Taped the paper onto the card. 
Taped the image onto the card slightly slanted. 
Put black thread in the button holes, glued the button onto the card.

...Products Used...
Marco Raffine Colored Pencils
The Paper Studio 4.5"x6.5" 'Mirabelle'
Unbranded Frame Die
Heart Button
Black Thread
Plus Tape Runner 
Beacon Gem-Tac Glue
White Cardstock
 
I hope you like my card and it will give you some inspiration.  
 
There are monthly challenges at LeAnn's World 101 Facebook Group.
Come on and join us in the fun!
 
She has a beautiful greyscale coloring book available for purchase.
...You can find her coloring book here...
 
Thank you for visiting!
Happy Crafty Hugs,   
Sherry x

STAMPRINTS DT

Hello My Crafty Friends,
This is my second post as a member of the Stamprints DT.

I want to share another card with you all that I made using the heart I just recently used.
Just added a beautiful butterfly to it and a different sentiment. :)

I enjoyed making a card with these pretty digis.
 Here's another view for you.
Here's the other side.
...For This Card - Step By Step... 
  White cardstock for the card base.
Added the sentiment and butterfly onto the heart in Paint Shop Pro.
Printed out a separate butterfly and flower, as well as the heart.
After coloring, fussy cut around the heart, butterfly and flower.
Taped a piece of embossed cardstock onto the card and used the distressing tool around it.
Taped the heart onto the center of the card. 
Attached pop-dots to the back of the flower and added it onto the original flower.
Attached pop-dots to the back of the butterfly and added it onto the original butterfly.

...Products Used...
Digistamp 'Butterfly #2' By: Stamprints 
Marco Raffine Colored Pencils
Spectrum Noir Markers - for the heart
Spellbinders Embossing Folder
Prima Marketing Distressing Tool
Elizabeth Craft Designs Fine Pointed Scissors
Core'dinations Cardstock
Forever In Time 'Pop-Dots'
Plus Tape Runner
White Cardstock

I hope you like my card and it gives you some inspiration.

Have a great day and thank you for visiting.
 Happy Crafty Hugs,  
Sherry x

Thursday, March 15, 2018

STAMPRINTS DT

Hello My Crafty Friends,
I am so excited, I have some great news I want to share! 
I am now a member of the Stamprints DT.

I enjoyed making a card with this pretty heart digi.
 Here's another view for you.
 
Here's the other side.
 ...For This Card - Step By Step... 
  White cardstock for the card base.
Added the sentiment onto the heart in Paint Shop Pro.
Printed out a separate flower as well as the heart.
After coloring, fussy cut around the heart and flower.
Taped a piece of embossed cardstock onto the card and used the distressing tool around it.
Taped the heart onto the center of the card. 
Attached pop-dots to the back of the flower and added it onto the original flower.

...Products Used...
Marco Raffine Colored Pencils
Spectrum Noir Markers - for the heart
Darice Embossing Folder 'Wire Fence'
Prima Marketing Distressing Tool
Elizabeth Craft Designs Fine Pointed Scissors
Forever In Time 'Pop-Dots'
Plus Tape Runner
Beige/White Cardstock

I hope you like my card and it gives you some inspiration.
 
Have a great day!
Thank you for visiting.
 Happy Crafty Hugs,  
Sherry x

LOVE TO SCRAP CHALLENGE #107

Hi There Crafty Friends,
  I'm wanting to let you know there is a challenge going on at...
Love To Scrap Challenge Blog
The theme for this challenge is...
Anything Goes

...Our sponsor this month is...
Prize: $25 gift certificate to the Blank Page Muse Shop

This is the 2cd card I have made with the beautiful stamps I received.

...Look at this beautiful mannequin, flower and butterfly...
 ...Rubber Stamps Used...

...Other Products Used...
 We R Memory Keepers Precision Press Stamping Tool
Memento Dew Drop Ink Pad 'Tuxedo Black'
Marco Raffine Colored Pencils
Spectrum Noir Alcohol Markers - on background
Sizzix Vintaj BigKick Die Cut Machine
Unbranded Corner Die
Elizabeth Craft Fine Point Tweezers
Elizabeth Craft Fine Point Scissors
Tombow Tape Runner
Ad-tech Crafter's Precision Glue
White Cardstock

This was my 2cd time using rubber stamps unmounted and I can say that I really enjoyed making cards with them. I know I will be using them often. There are so many beautiful stamps to choose from at the Blank Page Muse Shop I could browse for days. :)

You may want to visit the Blank Page Muse Stamps Fan Group as well.

I hope you like my DT card and it gives you some inspiration. 
The challenge runs until March 31st. Come on and join us in the fun!

Thank you for visiting!
Happy Crafty Hugs, 
Sherry x

THE CREATIVE CRAFTERS CHALLENGE #2

Hello There My Crafty Friends,
I want to let you all know that our second challenge is starting today at...
The Creative Crafters
 Our theme is "Anything Goes"

I want to share a card with you that I made for the challenge.
I love all the beautiful things my dear friend sent me, so wanted to make a card with them.
Like my hubby told me "It's different than what you usually make but I like it"...
I like it too and had a lot of fun making it. :)

...For This Card - Step By Step...
White cardstock for the card base.
Added a piece of wired edge ribbon across the embossed paper and glued the ends in back.
Used the tape runner on the back of the paper and attached it to the card.
Glued a piece of tulle behind the left side of the ribbon down to the right side of the card. 
Glued the small banner die cut onto a larger one, then glued onto the card.
Rolled the flower die cuts and glued the bottom on. Then used tweezers to curl the petals.
Glued the leaves, then the flowers onto the card. 
Attached two pop-dots on the back of the butterfly die cut and added it to the card.
Glued another banner die cut coming from beneath the flower on the left side of the card.
Using Ad-tech glue I attached the flatback pearls.

...Products Used...
- From My Dear Friend - 
Shimmery Embossed Paper
Leaves Die Cuts
Rolled Flower Die Cuts
Butterfly Die Cut 
Banners Die Cuts
- From My Stash -
Tulle
Christmas House Wire Edged Ribbon 'Magical Collection'
Forever In Time Pop-Dots
Flatback Pearls
Tombow Tape Runner
Ad-tech Crafter's Precision Glue
Beacon Gem-Tac Glue

I hope you like my card and it gives you some inspiration.
The challenge runs from March 15th to April 8th. 
Come on and join us in the fun!

Thank you for visiting!
Happy Crafty Hugs,
Sherry x

Sunday, March 11, 2018

CATCH OF THE DAY

Hello My Crafty Friends,
I have a card I want to share with you all for a challenge at The Outlawz.

I think this image is so cute! I want to go fishing, I know, it's still too cold for that, lol.
...For This Card - Step By Step...
 Beige marbled cardstock for the card base.
Cut a piece of patterned paper to fit the center of the card.
Taped the paper onto the card.
Then taped the image onto the card slightly slanted.

...Products Used...
Digistamp By: Annes Digital Art
Marco Raffine Colored Pencils
The Paper Studio 4.5"x6.5" 'Against The Grain'
Unbranded Frame Die
White/Beige Marbled Cardstock
 
Have a great day and thank you for visiting.
Happy Crafty Hugs,
Sherry x

...Challenge Entered...
The Outlawz - Freebie Progressive Challenge

CUTE AS A BUTTON NEW RELEASE

Hello There Crafty Friends!
I want to share with y'all a card I made for a new release at... 
 
I love tulips and so miss having them. I enjoyed coloring the beautiful...
...For This Card - Step By Step... 
  Yellow cardstock for the card base.
Cut a piece of patterned paper to fit the center of the card.
Taped the paper onto the card.
Glued a piece of lace ribbon onto the left side of the card.
Taped the image onto the card slightly slanted. 
I have to admit I goofed on the frame when I cut the image with the die. I accidentally cut part of the top off of it, ugh. I could have cut the deco part off but wanted it on there. So decided to add ribbon across the top (where I goofed) and go with the blue and yellow theme. :)
So I taped the image onto the card slightly slanted. 
Put scor-tape on the back of the ribbon.
Added the ribbon across the frame, put the ends in back of paper.
Tied a piece of blue ribbon around a piece of yellow ribbon and glued them to the card.

...Products Used...
The Paper Studio 4.5"x6.5" 'Kirby Teesdale'
Marco Raffine Colored Pencils
Unbranded Frame Die
Ribbon
Lace Ribbon
Scor-Tape
Ad-tech Crafter's Precision Glue
Beacon Gem-Tac Glue
Plus Tape Runner
Yellow/White Cardstock
 
I hope you like my card. :)
 
If you're looking for some more inspiration come visit...
 There are many more wonderful images to chose from at...
 You still have time to join in the challenge...
 You are also invited to join the...  
 
Thank you for visiting.
Happy Crafty Hugs,
Sherry x

Saturday, March 10, 2018

LEANN'S WORLD 101

Hello My Crafty Friends,
A friend of mine is new to creating digistamps and asked me to be on her design team.
Of course I said yes, as I love her adorable images and am happy to help her out. 
Besides, I had already started coloring some of the cuties. :)
 
 I would like to share a card I made with you all using the beautiful 'Forest'.
  ...For This Card - Step By Step..
 White cardstock for the card base.
Cut a piece of patterned paper to fit the center of the card.
Taped the paper onto the card.
Taped the image onto the card slightly slanted. 
Glued flowers onto the card.

...Products Used...
Digistamp 'Forest' By: LeAnn's World 101
Marco Raffine Colored Pencils
The Paper Studio 4.5"x6.5" 'Mirabelle'
Flowers
Plus Tape Runner 
Beacon Gem-Tac Glue
White Cardstock
 
I hope you like my card and it will give you some inspiration.  
 
There are monthly challenges at LeAnn's World 101 Facebook Group.
Come on and join us in the fun!
 
You may have seen the flower coloring pages I colored not long ago. 
She has a beautiful greyscale coloring book available for purchase.
...You can find her coloring book here...
 
Thank you for visiting!
Happy Crafty Hugs,   
Sherry x

Wednesday, March 7, 2018

SCRAPY LAND CHALLENGE #85

Hello My Crafty Friends,
First, welcome to my new followers.

I want to let y'all know that a new challenge starts today at Scrapy Land.
The theme is 'Anything Goes' using any brand of die that Scrapy Land sells.

...Here's what I made for this challenge...
Butterflies remind me of my beautiful daughter, as she loved them.
She also loved 'Fire and Ice' roses. So butterflies and roses together are perfect!
...For This Card - Step By Step... 
White cardstock for the card base.
Cut a piece of ivory cardstock to fit the card and taped it in place.
Cut a piece of brown cardstock to fit the center of the card and taped it in place.
 Added clear glue to the back of the rose die cut and glued it in the center of the card.
Used the butterflies die on the center piece of the rose die cut to cut the outline opening.
Taped the center piece onto the card.
Glued the ivory butterflies die cut in the butterflies outline opening.
Glued flower petals together, glued a flatback pearl on it, then glued it to the card.
Glued two flourish die cut pieces under the flower.
Then glued a flatback pearl on each butterfly.
 ...Used These Dies...
Flourish Pieces - from another Jeanine's Art Die - will be using soon

...Other Products Used...
Sizzix Vintaj Bigkick Die Cutting Machine
Darice Finishing Accents 'Paper Petals'
Flatback Pearls
Plus Tape Runner
Beacon Gem-Tac Glue
Ad-tech Crafter's Precision Glue
Pink/Ivory/Brown/White Cardstock
 
 
I hope you like my card it and it gives you some inspiration.
There's a great prize to be won, so hope you come join us in the fun!
 
Have a great day!
Thank you for visiting.
 Happy Crafty Hugs,  
Sherry x

Monday, March 5, 2018

LETS CRAFT & CREATE CHALLENGE #135

Hello There Crafty Friends,
I want to let you all know there is a new challenge starting today at...
LET'S CRAFT AND CREATE 
...The theme for this challenge is...
MARCH -- EASTER (APRIL 1ST IN UK)
(examples:- Bunnies, bonnets, daffodils)

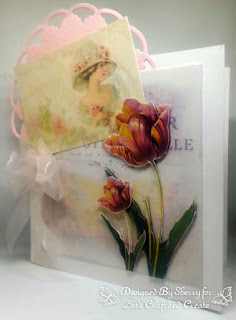
I love anything vintage so made a card with these beautiful images.
Here's another view for you.
And the other side.
...For This Card - Step By Step...
White cardstock for the card base.
I printed an extra tulip the same size as the one on the background image and one smaller.
Added tape to the back of the doily and attached it to the top left side of the card.
Then taped the background image onto the center of the card.
Next I taped the lady background over the doily.
Applied pop-dots to the back of the large and small tulip.
Added the large tulip over the tulip on the background.
Then added the small tulip onto the card.
Cut a piece of sheer ribbon, glued it onto the left side of the card, tucked behind the lady.
Made a bow with the same ribbon using the bow making tool. Glued it on the ribbon.

...Products Used...
Vintage Backgrounds By: Artsy Bee Digital
Darice 'Doily' Die
Elizabeth Craft Fine Point Scissors
Forever In Time 'Pop-Dots'
Ribbon
Plus Tape Runner
Ad-tech Crafter's Precision Glue
Bow Making Tool - my hubby made for me
Gorilla Contact Adhesive - to attach the bow
Pink/White Cardstock

I hope you like my card it and it gives you some inspiration.
There's a great prize to be won, so hope you come join us in the fun!

Have a great day! Thank you for visiting.
 Happy Crafty Hugs,  
Sherry x

Thursday, March 1, 2018

SHEEPSKI DESIGNS CHALLENGE #12

Hello There Crafty Friends!
I want to let you know that there's a challenge starting today at
https://sheepski-designs-challenges.blogspot.co.uk/
...The theme for this challenge is...
Flowers
 
I love the beautiful 'Serenity' image and love how she looks with the 'Wild Roses'. 
Couldn't decide which way I like it better.
  ...For This Card - Step By Step...
Colored the image, cut around the image and fussy cut around the flowers.
Taped the image onto a piece of patterned paper.
Went around the paper with the distressing tool.
Went around the paper with distress ink.
Used the distress ink around a white card base
Taped the paper onto the card.
..For the sentiment...
Stamped the sentiment on white cardstock using the stamping tool. 
Colored the images on it and the background
Fussy cut it out and used the distressing tool around it.
 
...Products Used...
Digistamps 'Serenity' and 'Wild Roses' By: SheepSki Designs 
Marco Raffine Colored Pencils
Kraft Paper - printed the image on
DCWV 4.5"x6.5" 'The Old World' Mat Stack
Prima Marketing Distressing Tool
Ranger Tim Holtz Distress Ink Pad 'Tea Dye'
We R Memory Keepers Precision Press Stamping Tool
Elizabeth Craft Fine Point Scissors
Unbranded Clear Sentiment Stamp
Tombow Tape Runner
White Cardstock
 
I hope you like my card and it will give you some inspiration.
Come on and join us in the fun!
 
If you like the image I used by SheepSki Designs or some of the other wonderful images...use this coupon code to receive 10% off your purchase...(SKISHERRY10) 
 
There are also monthly challenges at SheepSki Designs Facebook Group. 
 
Thank you for visiting!
Happy Crafty Hugs,   
Sherry x

MIX IT UP CHALLENGE #11

Hello There Crafty Friends,
I want to let you all know there's a new challenge starting today at...
The theme for this challenge is...
Anything Goes with a Twist - Making your own Background

Okay, I admit, I am strange, lol. But the wrappers you get in a package of Halls Cough Drops these days have what I feel are 'pick me up and make me feel better' sentiments. I had wondered before what, if anything, I could do with them. So when the 'make your own background' theme came up, aha, light bulb moment, lol. So why not make something good out of being sick, lol.

...So here's my first Halls wrapper background made into a card...
...For This Card - Step By Step...
I got the idea to use glue watching this video:
Though I lightly brushed glue onto the paper itself and added the wrappers.
After that dried, I lightly brushed glue over the wrappers.
Let that dry, then lightly brushed glue on the back of the paper.
After that dried it was pretty much flat again. I taped it to a white card base.
Using the stamping tool I stamped the image and text onto yellow marbled cardstock.
 Then colored the image and cut out the image and text.
Used the distressing tool around the edges of the text.
Used the tape runner to add tape on back of each and attached them to the card.
 ...For This Card...
I had another idea and decided to try it without overlapping the wrappers. 
I cut one wrapper in half and added the halves on each side.
Same steps as the other card, just used purple marbled cardstock with this one.
 
...Products Used...
Elmer's School Glue 
Halls Cough Drops 'Honey Lemon Flavor' - wrappers
We R Memory Keepers Precision Press Stamping Tool
Rubbernecker Stamps 'Get Well' - won from a challenge
Memento Dew Drop Ink Pad 'Tuxedo Black'
Elizabeth Craft Fine Point Scissors 
Marco Raffine Colored Pencils
Prima Marketing Distressing Tool
Tombow Tape Runner
Yellow Marbled/Purple Marbled/White Cardstock
 
Hope you like my DT cards and they give you some inspiration.
  We would love to see you join us in the fun!
The challenge will close at 6pm EST on March 31st.
 
Thank you for visiting.
Happy Crafty Hugs,
Sherry x

LOVE TO SCRAP CHALLENGE #107

Hi There Crafty Friends,
  I'm wanting to let you know there is a new challenge starting today at...
Love To Scrap Challenge Blog
The theme for this challenge is...
Anything Goes

...Our sponsor this month is...
Prize: $25 gift certificate to the Blank Page Muse Shop

I made two cards with the beautiful stamps I received. The other will post on the 15th.

...Look at this beautiful clock and sentiment...
...Rubber Stamps Used...

...Other Products Used...
 We R Memory Keepers Precision Press Stamping Tool
Lawn Fawn Ink Pad 'Wild Rose'
Marco Raffine Colored Pencils
Spectrum Noir Alcohol Markers - on background
Sizzix Vintaj BigKick Die Cut Machine
Unbranded Corner Die
Elizabeth Craft Fine Point Tweezers
Tombow Tape Runner
Ad-tech Crafter's Precision Glue
White Cardstock

This was my first time using rubber stamps unmounted and I can say that I really enjoyed making cards with them. I know I will be using them often. There are so many beautiful stamps to choose from at the Blank Page Muse Shop I could browse for days. :)

You may want to visit the Blank Page Muse Stamps Fan Group as well.

I hope you like my DT card and it gives you some inspiration. 
The challenge runs from March 1-31. Come on and join us in the fun!

Thank you for visiting!
Happy Crafty Hugs, 
Sherry x

LOVE TO CRAFT CHALLENGE #20

Hello My Crafty Friends,
There's a new challenge starting today at
The theme for this challenge is...
Anything Goes

Welcome Alka, Marzia, Tina and Sherrie...thank you for following my blog. :)

I had fun making this card, using mostly dies. I have been sick, still dealing with it, so having something to do when I had a spurt of energy was a good thing.
 ...For This Card - Step By Step...
Ivory cardstock for the card base.
I cut a piece of red cardstock to fit the front of the card.
Then used the border dies on it and taped it onto the card. 
I did add some glue onto the back of border part first.
Added distress ink on the lower border die cut, then glued it in place.
Next I glued the frame die cuts onto the card.
Then glued the flourishes in place.
Glued roses onto the card, over the flourishes.
Cut a piece of large twine and small twine to make bows.
Made two bows with the twine using the bow maker.
Glued the large bow onto the card, then the small bow slightly above it.
Stamped the sentiment onto the small banner.
Then glued the banners at an angle onto the card.
...Products Used...
Spellbinders Borderabilities Card Creator Dies 'Curved Borders 2'
Crafters Companion Metal Die/Stamp Set  'Cherished Memories'
Ranger Tim Holtz Distress Ink Pad 'Tea Dye'
Memento Dew Drop Ink Pad 'Tuxedo Black'
Tattered Lace 'Florentine Flourishes' Dies
Darice Hemp Cord and Roses
Unbranded Frame Dies
Ad-tech Crafter's Precision Glue
Beacon Gem-Tac Glue and Tombow Tape Runner
Ivory/Red/Green Cardstock

Hope you like my DT card and it gives you some inspiration. 
We would love to have you join us!

Thank you for visiting.
Happy Crafty Hugs,
Sherry x